I got a Peavey 6505+ 112 (a high gain amp, generally the go to amp for metal or similar styles of music) for my 18th birthday last
October, and have slowly been upgrading and adding to my rig, with pedals and
speaker cabinets, however the one thing I was desperately missing, was ease of
portability. Sure I had a nice amp, but there was no chance in hell I would be
taking it anywhere without owning a car (or pestering my parents for a lift
which I don't particularly wish to do).
I found a thread on the Ultimate Guitar forums, which inspired me to do as they had: Convert my amp into a head
and cabinet!
I took the basic design of what he had
done, and made whatever changes I had to, as I brought different materials to
him.
The over all build cost was £100, which is
pretty cheap, considering that I managed to fit in a new speaker, all the tolex
needed (only just) and smaller necessary items (e.g. feet, handle etc.)
Surprisingly, the tolex was surprisingly
expensive, costing about £30 pounds in total, for only just enough material, so
I had about 10cm spare.
The parts I brought were as follows:
1x Emminence V128 speaker (12” 8ohms)
8x cutaway corners (for cabinet)
4x 38x15mm rubber feet (for head)
2x 10x27mm handle (for cabinet)
1x 1.35x1m white Tolex strip
1x 0.4x1m white Tolex strip
25cm blue LED strip (100mA, 12V)
It took me quite a while to do this, mostly
because I was busy with college in the week, and often either being lazy at
weekends, or having other things to do like coursework and helping my parents. This
made it a fairly on/off project, and it took around 1 month and a bit to
complete.
I finished the head first, as I wanted to
be able to use the amp at college (when it was a combo, it was impossible to
bring back and forth on the bus).
I started off by taking off the front and
back panels, then removing the amp from its chassis. Once I had taken the
handle and corners off, I started to peel the Tolex off the amp. This wasn’t a
hard job, but at times the material really wanted to stick to the wood.
The next job after this was to cut wooden
chassis in half, separating what would become the head and cabinet. For some of
the precision woodwork such as this, I recruited the help of my dad; not
because I could not do it myself, but because as he has done a lot of woodwork
in his life, he would do a better job and get a straighter cut than I ever
could. There was a little bit of an issue with making the cut, as I could not
get the speaker grill off, due to not being able to remove the back panel. This
meant when my dad was cutting the top of the amp, he had to be careful to miss
the wooden frame of the grill, which was sticking up slightly.


After this I set to work on the head, first
starting with wiring the LED strip up. I wired it up to the power supply that
had previously lit the LEDs that lit up on the faceplate. The issue this caused
was it was rated at 15V, whereas my LED strip was rated at 12V. To keep the
power low, I used a resistor between the power supply and the LED strip. I had
a few problems with the resistor values, as when I first wired in a 39 ohm, and
later on, a 68 ohm resistor, I smelt burning as soon as I turned the amp on,
and traced the smell to the resistors. In the end, I settled to use a 470 ohm
resistor, which works perfectly, and gives the amp a nice compromise between
being too bright, stealing an audience’s attention, and being bright enough to
be easily noticeable.
Once I had finished the soldering the LEDs
to the power cables, I stuck the LED strip down in between the reverb tank and
the preamp tubes.
I also quickly gave the reverb tank a few coats of black spray paint, to make it stand out less.
 |
| the 39 ohm resistor |
 |
| testing the LEDs |
 |
| testing the LEDs (with a 68 ohm resistor) in the cabinet |
The next job the head required as fitting a new bottom panel to it. I picked
out a section of plywood marked up the dimensions I would need, and got my dad
to cut it out, for aforementioned reasons. I glued and screwed this bit of wood
to the bottom of the head, clamped them together and waited for it to dry.
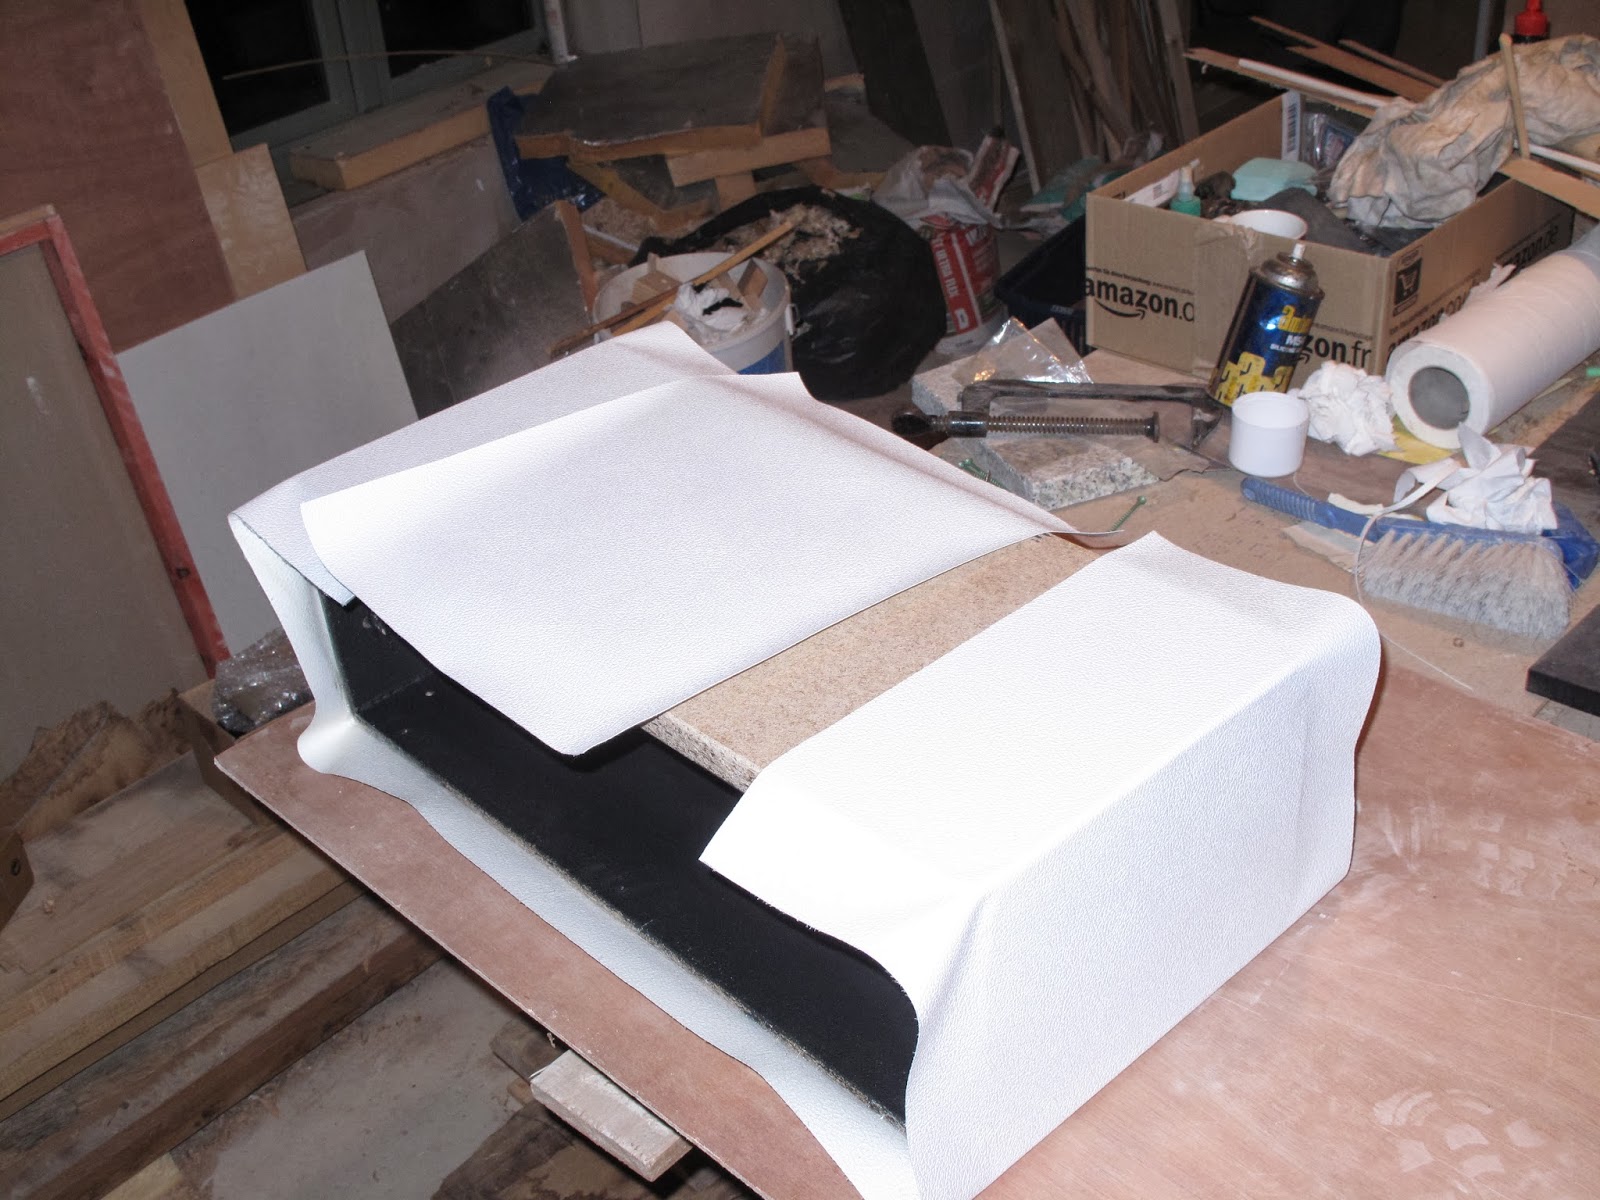
The next task was to put the Tolex on to
the cabinet. This was a hard job, which was not helped by the fact that I had
barely enough to finish the job. Because of this, I was forced to use two
sections of Tolex and join them up. The line between the two sections is fairly
obvious, but it could have gone much worse. Once the cabinet was covered in Tolex, I checked that the corners and handle still fitted and drilled holes for
the feet. I found there was a slight
problem with the bottom corners, as I had used a thicker piece of wood to cover
the bottom. The bits that went inside the cabinet would not fit because of
this, so I had to cut out a small groove at the bottom to accommodate for this.
Other than that, it all went in smoothly, so I finished the head off by putting
the amp and panels back in. I changed the design here slightly, as I put the
screws that held the front panel in place, so that they were accessible from
the front, so that I could change the preamp tubes easier.

 |
| the grooves made for the corners |
The speaker cabinet was next on the list of things to do.
First I had to work out how I would get the back panel off, as it was stuck in very tightly. I tried putting screws, using them
to pull it out in but in the end, it seemed as if there was no choice, but to
cut into the top of the cabinet section of the amp, so I could push the panel
out and thereby be able to access the screws holding the grill in.
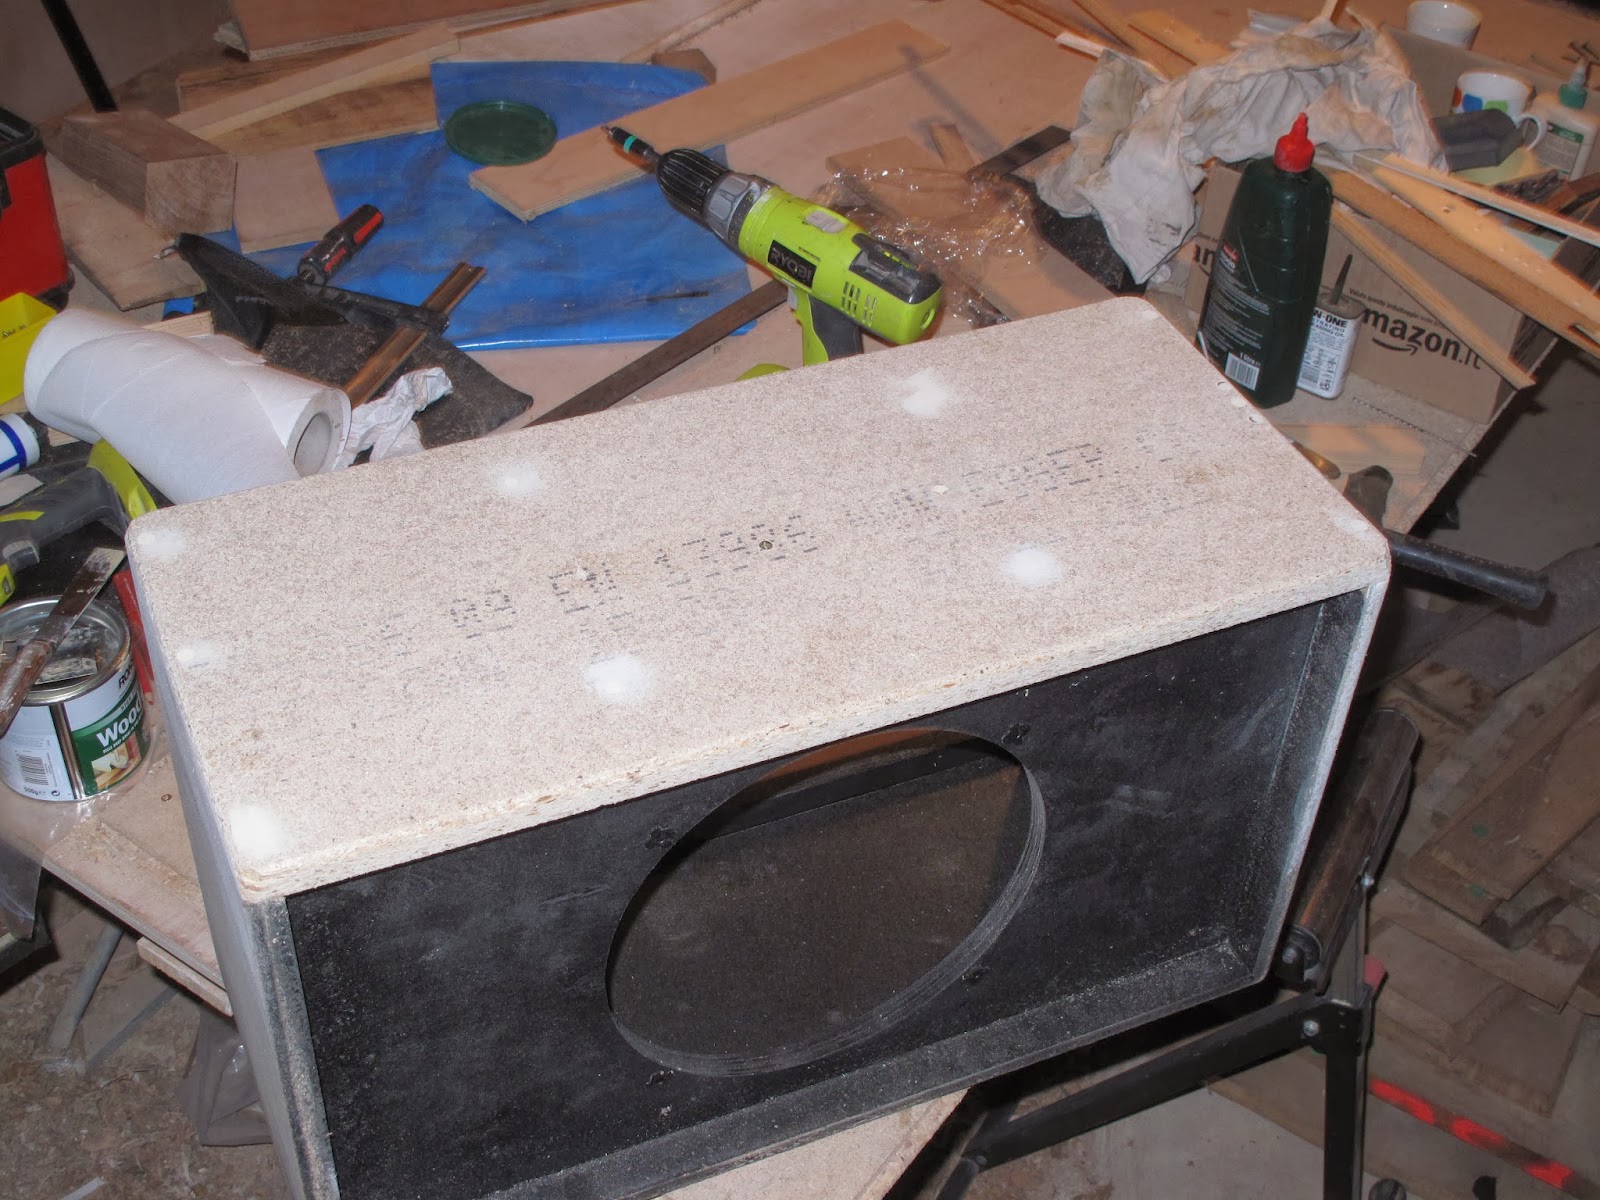
As I needed to put another layer of wood to
complete the cabinet, it was okay to do this. I simply cut a wide circle in the
top of the cabinet, and reached my hand inside to push the back panel out. While I was doing this, I also cut a smaller hole, which I used to get the speaker cable out.
Once
everything was taken out, and I was left with an empty shell, I glued the
circles of wood back in place and filled them.
When this was finished, I got the piece of wood
that was to go on the top, and put the handle screwthreads underneath
it.
Then, I glued the tolex down and waited for it to dry.
I then attached the handle, corners, and new
speaker. Instead of having a jack to plug a speaker cable into, I decided to
keep plugging the amp in the same way for convince, cutting out a small segment
out at the top of back panel to feed the wire through. It was meant to feed in
and out, so the cable didn’t stick out when it was being transported, however
the cable seems to be stuck outside.
The other issue I found with this was the
handle. I measured the holes wrong, so the handle is permanently sticking
upward slightly. This caused an issue with mounting the head on top of it, as
the feet are not tall enough, so it wobbled slightly. To sort this, I swapped the feet on the head from my other amp, which had taller feet.
The V12 speaker is similar to V30s, which I
have in my 2x12 cabinet, however the V12 sounds smoother, and it is also has a
darker voicing. At first, I found it hard to like, but I soon enough warmed to
it. The one thing that I noticed off the bat, was the cleans; 6505s aren’t well
known for their cleans (not saying that you can’t get a half decent clean out
of them) but I found a much sweeter clean tone using the V12, as the V30s are a
little too harsh for cleans (on this amp at least).
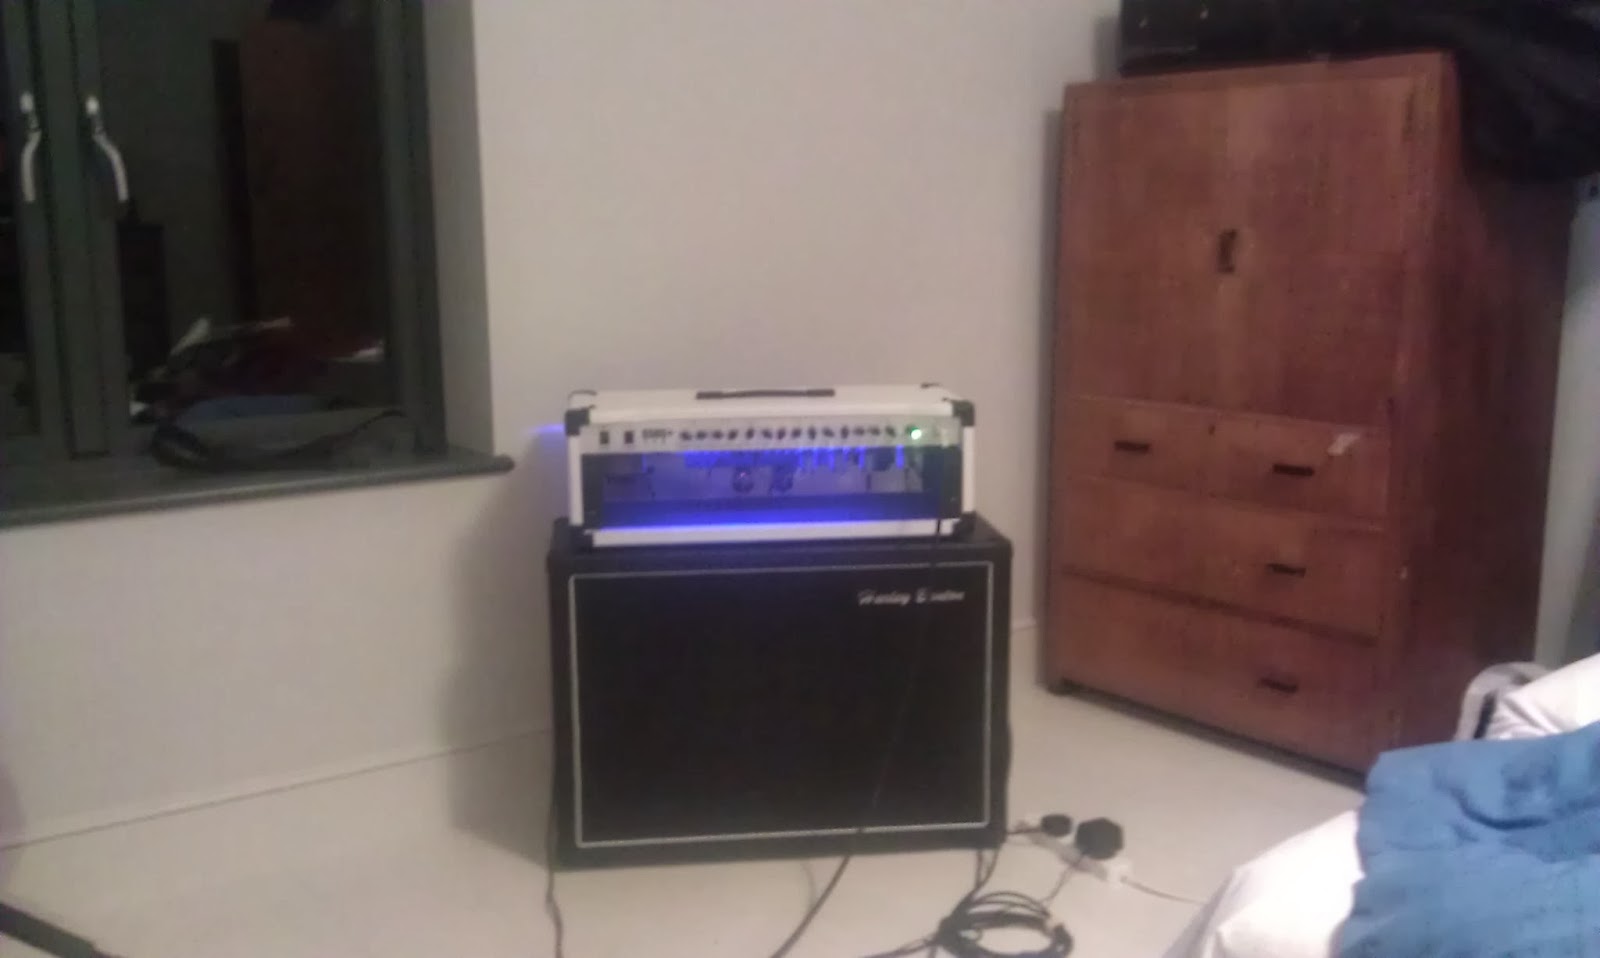
Here is the final product!
Old rig (minus bass guitar) :
New rig (minus 2x12 cab at which is currently at college) :